Wednesday, January 27, 2010

Make Life Easier

Have you been a vegetarian/vegan for a while?  Are you getting tired of chopping veggies every night?  Is there an easier way? What about convienence when you get home and don't feel like getting out the cutting board and knife?

Here's what I do to make life a little easier.  I cut up romaine and let 'er roll in my salad spinner.  I also shred some green cabbage and do the same. 

I have a rubbermaid plastic container that I drop all that beautiful green phytonutrients into.  Here's a picture so you get an idea of what I mean.  That is enough greens for about three days.

I also have a foodsaver.  I really love that appliance and don't even do enough with it yet.  I'm kinda slow when it comes to getting all my ducks in a row, but I eventually get there.
I thought I'd let you see what I'm talking about in case you're interested in getting one.  And no, I don't make a penny on any of the gadgets or appliances I recommend.  I just love them so much and find them useful and want to pass that information on to my fellow E2Lers, vegans and vegetarians.  Well actually anyone that might be interested.  Can't leave behind the SAD eaters, can I.

So what I do is fill up quart size mason jars.  The wide mouth type, not the regular.  Not only is it easier to get the veggies into the large size opening, but I also only have the wide jar sealer, not the regular size.

Well let me show you more of what I do.  You know the chop wizard.  I've talked about it before a few months ago.  I love that kitchen tool.  It makes my life so much easier, and it will yours too.

The food processor only shreds or slices.  I can chop veggies in the bottom, but sometimes it's hard to get them just the right size you want.  And I really like the uniform size of chopped vegetables I get with the chop wizard.  Here's a video in case you want to see it in action.


I had mine for almost 4 years and I broke it.  It was my fault, not the product.  I was so bummed.  I went to two of my local Walgreens because that's where I purchased my first one,  but neither one of carried it anymore.

So I thought I'd check out Bed, Bath and Beyond.  Golly gee they made my day!  Still $19.95 plus tax.  So I hurried home with my new, old kitchen tool and got to work on a few on my regular salad fixings.

I chopped away on some carrots, celery, broccoli, cauliflower and cucumber with that chop wizard.  After each vegetable, I stuffed a jar full of 'em, placed on the cap and put it aside until I had all five jars full.  Next step was to take them over to the foodsaver and begin sucking the air out of 'em.  It takes at the most, 30 seconds. 


So once I have them all done, I refrigerate the jars and have fresh chopped veggies when it's time to prepare my supper salad.  The only thing I add that's not already chopped is grape tomatoes, walnuts and an apple.  Next time I do the chopping, I'll chop a jar full of walnuts so I won't have to do those either.  That means I will be chopping only the apple.  I may even give them a try and dip them in some lemon juice so they don't turn color. 

I also add some type of bean, usually garbanzo beans to the salad and that doesn't require chopping so it makes my supper salad preperation so quick, easy and convenient.

Make your life easier and give it a try.  If you don't have the foodsaver I'm sure using the jars would still be helpful.  Some of the jars are used up within 3 days.  Some a little longer, but only a day or two more.  So you might be able to get away with not having to use the foodsaver.

My next task will be freezing some of my cooked items and using the foodsaver so that they'll last so much longer in the freezer.  That will allow me to make lasagnas, stir fries; any healthy dish and have plenty of frozen suppers so that when I don't feel like cooking, I won't have to.

I hope these have been some helpful hints for you.  They are time savers for me.  I have fibromyalgia and osteoarthritis and when I have a bad day, I don't want to prepare or cook anything.  So I'm trying to get a head of the game so that I don't cave into eating SAD foods.

Eat to live, everyone!  :)

Monday, January 25, 2010

Mini Crustless Tofu Quiches

I made these the other night so that I could have something other than a bean buritto in the refrigerator already prepared for dh's breakfast.

They were so delicious that I want to recommend that you all give them a try.  I forgot to take a picture, but Susan's photo is always much prettier than mine anyway.

Here's the beauties.  They taste as good as they look and were so easy to prepare.

The nutritional yeast added a nice flavor for a cheesy taste.  I didn't have fresh herbs, but the dried gave these great flavor and I used the recommended tahini, but omitted the salt.  I also used the regular muffin pan and sprayed it with olive oil as recommended.

I hope you'll try these.  I can't recommend them any more highly, they're that good! 

Mini Crustless Tofu Quiches

olive oil spray
1 teaspoon minced garlic
1/2 cup bell pepper
1 cup chopped mushrooms
1 tablespoon minced fresh chives (or one green onion)
1 teaspoon minced fresh rosemary (or 1/2 tsp. dried, crushed)
black pepper to taste

1 12.3-ounce package lite firm silken tofu, drained of water
1/4 cup plain soymilk
2 tablespoons nutritional yeast
1 tablespoon cornstarch (may sub another thickener such as arrowroot or potato starch)
1 teaspoon tahini (preferred) or cashew butter
1/4 teaspoon onion powder
1/4 teaspoon turmeric
1/2-3/4 teaspoon salt

Preheat the oven to 375 F. Spray 12 regular-sized muffin cups well with non-stick spray. (I used silicone cups like these.)

Lightly spray a non-stick skillet with olive oil and sauté the garlic, bell peppers, and mushrooms over medium heat until the mushrooms just begin to exude their juices. Stir in the chives, rosemary, and freshly ground black pepper, and remove from the heat.

Place the remaining ingredients into a food processor or blender. Process until completely smooth and silky. Add the tofu mixture to the vegetables and stir to combine. Spoon equally into the 12 muffin cups: it will fill regular muffin cups about halfway.

Put the muffin pan into the oven and immediately reduce the heat to 350 F. Bake until the tops are golden and a knife inserted into the middle of a quiche comes out clean--about 25-35 minutes depending on your oven and muffin cups (silicone will take longer than metal, so if you're using a metal pan, check it at 20 minutes). Remove from the oven and allow them to cool for about 10 minutes. Enjoy! They're light, so plan on making more of these—or serve hearty side dishes—if you're serving more than 3 people.

4 mini-quiches contain: 96 Calories (kcal); 3 g Total Fat; (23% calories from fat); 11 g Protein; 8 g Carbohydrate; 0 mg Cholesterol; 459 mg Sodium; 2 g Fiber

Thursday, January 21, 2010

Wednesday, January 20, 2010

Soy - Is it healthy or not?


Over the past decade, the research regarding the health benefits of soy foods and soy constituents has increased at an amazing rate. In many ways, it seems soy research has produced more questions then answers. The findings of many human studies are often inconsistent and contradictory.
Evidence does suggest that Americans would benefit from replacing some animal protein in their diet with soy protein. Decreasing the percentage of animal protein in the diet is desirable. The link between animal products and many different diseases is strongly supported in the scientific literature. Soy products can be useful in moving toward a plant-centered diet with less saturated fat, less animal protein, more plant protein and more fruits and vegetables. Soybeans are rich in protein and the amino acid content makes them a complete vegetable protein.

There is evidence to support the role of soy protein and isoflavones in lowering cholesterol levels and thus, reducing the risk of coronary heart disease. In October 1999, FDA approved the following health claim for foods containing soy protein: “A diet low in saturated fat and cholesterol that includes 25 gm of soy protein may help reduce the risk of heart disease. These soy components include trypsin inhibitors, phytic acid, saponins, isoflavones, and fiber. Since the FDA health claim was approved, ongoing studies have shown that the hypocholesterolemic effects of soy protein while relevant, are quite modest. The American Heart Association issued a statement in January this year saying that after analyzing 22 studies, an association committee found large amounts of soy in the diet reduced LDL cholesterol only 3% and had no effect on HDL cholesterol.(1)

Soybeans contain two groups of phytochemicals: saponins and isoflavones, that contain health benefits. Isoflavones are classified as phytoestrogens as they can have very mild estrogenic effects under some conditions or anti-estrogenic effects as they block the body’s hormonally active compounds. Because of this, soy isoflavones have been and are continuing to be studied to determine their relationship to conditions and diseases of particular concern to women. These include effect on menstrual cycle, menopause symptoms, osteoporosis, breast cancer, and mental decline associated with menopause and aging.

Eastern or Asian populations have a lower incidence of hormone-related diseases, such as breast cancer, uterine, and prostate cancers, cardiovascular disease and osteoporosis. It has been suggested that soy consumption is one reason for this difference in disease incidence. Women who were born in Asia, but migrated to the US had low risks of breast cancer; possibly due to their early exposure to soy. But obviously soy is only one of many factors that influence cancer risk and now we know it is the effect of many contributing factors that make a diet cancer-protective. At this time, consensus is building that soy food intake during adolescence, a time when breast tissue is most sensitive to environmental stimuli and carcinogenesis, may reduce the risk of breast cancer later in life. (2) Beyond adolescence, the results on soy and breast cancer are more difficult to discern, especially since dietary influence on cancer is greater before adulthood compared to after.

The intake of dietary and/or supplemental soy, particularly soy isoflavones, however is a concern in breast cancer survivors because there is fear that soy isoflavones may have detrimental effects in women with breast cancer or those with a history of breast cancer due to the estrogen-like effect of isoflavones. Concerns are based primarily on the estrogen-like effects of isoflavones and the results form one rodent study which showed that in immunocompromised mice with their overies surgically removed to abolish estrogen production, certain soy products and isoflavones stimulated the growth of exisiting estrogen-sensitive mammary tumors.(3)
To summarize, there are two contradictory claims being made about soy. One is that soy is protective against breast cancer and should be recommended for consumption by healthy women and breast cancer patients. The other is that soy is harmful for women with a history of or at high risk for breast cancer and because of this should be avoided by such women. There is actually a lack of convincing evidence to endorse either claim. Beans in general have dramatic benefits to protect against breast cancer. A healthy diet includes a variety of beans, and not a disproportionate share of calories from any one food. Some soy beans or tofu added to a healthy diet should not be expected to be a risk or offer significant benefit.
Extraneously to the issues above, there is internet chatter and opinions from health writers who have an agenda to vilify soy as a dangerous food. Soy may not be a super-food (such as broccoli) but the preponderance of evidence does not suggest that eating moderate amounts of unprocessed (edamame or soy beans) or lightly processed (tofu or soy milk) soy creates hypothyroidism or causes cancer. Processed foods, because of their low nutrient levels, high amount of salt, acrylamides and other toxic additives should not be considered healthy. Vegetarians and vegans who eat tofu-turkey, soy burgers, soy ice cream, soy hot dogs, soy cheese and other soy-derived processed foods on a regular basis are certainly not eating a healthy diet. Isolated soy protein is a heavily processed food with a low nutrient-per-calorie ratio. The key to good health is to eat unprocessed foods because their nutrient per calorie density is high.

Lastly, there are some legitimate health concerns from soy-based infant formulas.(4) Why should that be a surprise, since the beneficial health effects from breast milk is not even closely approximated by infant formulas. The fact that soy formulas may be worse than cow’s milk based formulas because of higher aluminum content or high isoflavone content does not criminalize the soy bean.

References

1. Erdman JW. Soy Protein and cardiovascular disease. 2000; Circulation, 102:2555. Soy Protein Shows Little Effect on “Bad” Cholesterol. American Heart Association scientific statement. January 17, 2006. Available at: http://www.americanheart.org/presenter.jhtml?identifier=3037031

2. Shu XO, Jin F, Wen W, et al. Soybean intake during adolescence and subsequent risk of breast cancer among Chinese Women. Ca Epidemiology Biomarkers and Prevention 2001; 10:483-488.

3. Hsieh, C., Santell, RC, Hasleam SZ, Helferich WG. Estogenic effects of genistein on the growth of estrogen receptor-positive human breast cancer cells in vitro and in vivo.

4. Setchell KD, Zimmer-Nechemias L. Exposure of infants to phyto-oestrogens from soy-based infant formula. Lancet 1997; 350(9070):23-7. Miniello VL, Moro GE, Tarantino M, Natile M, Granieri L, Armenio L. Soy based formulas and phyto-oestrogens: a safety profile. Acta Paediatr Suppl. 2003; 91(441): 93-100. Badger TM, Ronis MJ, Hakkak R, Rowlands JC, Korourian S. The Health Consequences of early soy consumption. J. Nutr. 2002; 132(3): 559S-559S.

Is there a value of high-fat foods

Tuesday, January 19, 2010

Glycemic index - Fruits


My husband has diabetes and is on the Engine 2/Eat to live journey.  It's mostly Dr. Fuhrman's approach, but he does eat more grains that what Dr. Fuhrman recommends. 

His blood pressure and blood glucose are coming down nicely and it's only been 2 weeks since he's changed his diet.  We are both pleased that they're coming down so fast.

Today he checked his blood glucose and it was up more than we'd like it to be.  It was the day before also, but not so much that we thought it bothered us.  So we traced back over the past couple of days and see what he'd eaten over the weekend too since he ate some SAD foods, but we just couldn't figure it out.

Then I remembered that the only thing different was that I bought a fresh pineapple and we cut it over the weekend and he's been eating it.  It's so yummy and delicious.  :-)

So I decided to see where pineapple sits on the glycemic index and found that it's placed in the high category.  We were happy to find the culprit, but not happy that it was the fresh pineapple.  :-(

So for us, pineapple will sit on the grocery shelves until his levels are more nomalized and he's off medication.  Well...........maybe once in  a while we'll get it for a treat!

So I thought some of you may be interested and decided to post the glycemic index for fruits.  I hope it's helpful for some of you.

Eat to live!

Cherries 22

Grapefruit 25

Prunes 29

Apricots, dried 30

Apple 38

Peach, canned in juice 38

Pear, fresh 38

Plum 39

Strawberries 40

Orange, Navel 42

Peach, fresh 42

Pear, canned 43

Grapes 46

Mango 51

Banana 52

Fruit Cocktail 55

Papaya 56

Raisins 56

Apricots, fresh 57

Kiwi 58

Figs, dried 61

Apricots, canned 64

Cantaloupe 65

Pineapple, fresh 66

Watermelon 72

Dates 103

Saturday, January 16, 2010

Green Pea Pesto Spaghetti Squash

Isn't that basil beautiful .  I found it at my local Albertsons.  I've never seen such large basil leaves.

The amount of basil in the package was a nice amount too.  I packed a 1/2 cup full and still had a little left over.  It wasn't cheap though, so I may end up growing a nice, large  plant inside near a sunny window.

Usually the store has plenty of parsley and other herbs, but not basil so this was a treat to find such a large amount for this new recipe I wanted to try.

A member of Dr. Fuhrman.com posts new recipes each week and  the spaghetti squash  was one I've wanted to try for a while.  I made it last night and WOW.  It's a new favorite.  :-)

It's also the first time I've ever tried to cook this particular squash and I really loved it so much that I think I'll look for some other recipes for this new favorite vegetable.

I had so much fun cooking this squash.  I was experiencing a sense of exploration and discovery.  hee hee  I almost thought that I might have chosen a dud because I cooked it for the amount of time it said and when I tried to remove the insides, there was no spaghetti.  So I cooked it for a little longer and when I tried a second time I had strands.  :-)

What I noticed is that there was a difference in the skin when it was ready.  When you prick the outside and place it in the microwave, the outside is hard and unyielding.  But afterwards, when it's been cooked for the proper amount of time, the outside becomes pliable and soft.  But watch out because it's extremely hot.  I used a pot holder to hold it while I scooped out all the spaghetti.

 The recipe called for a medium size squash, but I just got whatever they had at Albertson's.  They all looked pretty uniform to me, so I didn't know if I had a small, medium or large one.  :-)

 After I finished scooping out all of the spaghetti strands from it's shell, (I had a blast doing that) I had quite a volume of the stuff.

But some of the  squash is blended with the pesto sauce, so I didn't worry about it.  I figured it would work out fine even if there was more than the recipe called for.

The author of the recipe used a 1/2 cup of chopped tomatoes, but I noticed one of the other members used a can of tomatoes, so that's what I did too.  For one thing I didn't have but 1 tomato and for another, it didn't seem like that small amount would be enough tomato for the pile of squash I had. 

The pesto is so easy to make.  I used my food processor thinking it would be quicker and easier to clean, but next time I'll try using my vitamix and see which way I like better.  The vitamix will puree it smoother and creamier, but the processor is so much easier to remove the creamed mixture than the vitamix would have been.


The pesto called for green peas, some of the spaghetti squash, basil and pine nuts.  I didn't have any so I used walnuts instead.  I love pine nuts so the next time around I'll make sure I have some on hand.

Once the sauce is blended, you spread it on top and bake the dish at 350 for about 30 minutes.

I let it cool while I my dh and I ate supper.  Afterward, I sliced and plated a serving.  I just wanted to try a small amount because I was already satisfied with the huge salad I'd just eaten.  But once I ate that first piece, I just had to have another.  :-)


I've tried many different recipes while doing E2L, and this was one of the more simple and easy ones.  That's probably one of the reasons I enjoyed making it so much.  :-)

I'm asking the author if I can post the recipe here in case there is anyone who would like to try it.  It's a winner!

So ............. eat to live everyone!

Holly (Hojo) at Dr. Fuhrman's membership website gave me permission to post her recipe, so here it is.  Many thanks to her.

Green Pea Pesto Spaghetti Squash

    4 main dish servings, 6 side dish servings

1 medium spaghetti squash
1/2 cup tomatoes (I used a can of tomatoes)
2 tsp oregano
1/2 cup frozen green peas
4 cloves garlic
1/2 cup fresh or frozen basil
1 1/2 - 2 oz. pinenuts (I used walnuts)

Cook spaghetti squash by preferred method. I like to pierce it several times and microwave for 4 minutes, then cut it in half & scoop out the seeds, put the halves face down on a dinner plate & microwave for another 8 minutes or so, until soft.

Once cooked, remove strands from one half of squash and add to a lightly sprayed 6x9 rectangular baking dish (or similar size) along with a little squash from the 2nd half. Stir in tomatoes and oregano.

In a high powered blender add the green peas, garlic, basil, pinenuts and the remaining squash. Blend until smooth & creamy.

Spread pesto across the top of the spaghetti squash and place in preheated oven. Bake at 350* for 30 minutes, until pesto seems to have firmed up some.

Delicious!  :-)


Sunday, January 10, 2010

Portobello mushroom burger

All week I've made some E2L recipes either from, Eat To Live or from the Eat For Health Cookbook
Today I decided to try something different.  I made a portobello mushroom burger for my dh.
I, of course had to have one too.  hee hee  I also included some baked sweet-potato fries with the burger, and oh what a treat!  Both of these recipes are from, The Engine 2 Diet which my husbands been reading.  If you read yesterday's post, you know he just started eating a heathy diet on Monday.   The burger was very filling; I almost couldn't finish it. 

The picture above is a toasted whole-wheat thin bun, spread with hummus on both halves.  I topped one side with torn romaine pieces with a slice of tomato on top of that.  There's no sodium in the buns and only a very small amount of fat.  Not perfect, but not bad either.  My hfs doesn't carry buns or rolls, or if they did they weren't on the shelf.

The picture to the left has some carmelized onions atop the other half.  I water sauteed one onion which wasn't part of the recipe, but since my dh loves onions, I decided to add them to the burger for added flavor.  There was extra onion left over after topping both burgers so next time I'll probably use a small onion instead.

The recipe had you oven roast the mushroom.  I only used a little vegan worcestershire sauce and not the tamari sauce or the beer.  It came out of the oven with quite a bit of moisture, so I was glad I decided  to toast the bun.  I think next time what I'll do is marinate the portobello for a couple hours in some balsamic vinegar, onion powder, garlic powder, and whatever else strikes my fancy and then grill it .

The portobello is now on the bun.  I thought about what else I should add to the burger, but decided it was already going to be stacked high enough without being too cumbersome so I decided not to add salsa or avocado which I really wanted to do. :) Next time I will definitely be adding the salsa. 
If I and dh were at our goal weight I'd also add the avocado, but since we aren't, that would have been way too much since we add avocado every other day to our evening salad.

The sweet-potato fries were delicious, even though the texture wasn't crunchy like a fry.  But they were oh so sweet.  I could have made a meal with only the fries.  :)  The picture to the left is 2 medium sweet potatoes cut up into fries.  They just barely fit on the pan and that was the largest one I had. 
I baked them in the oven for a tad too long - the ends were a little over cooked.  Here again I altered the recipe a bit.   I added some seasoning to coat them for some added flavor.  The recipe recommended using a casserole dish, but I didn't think they'd cook right if I did that. So I sprayed a sheet pan with an olive oil spray to help the potatoes to not stick to the pan and it worked pretty well.

All in all it was a very tasty dish, and we both enjoyed it.  We will be eating this again with the added changes I mentioned. 
Portobello mushroom burger

4 Portobello mushrooms, rinsed
Low-sodium tamari
Vegetarian Worcestershire sauce
Splash of beer (optional)
Cracked pepper to taste
1 large red onion, sliced into thin rounds
4 whole grain buns
Dijon mustard or Healthy Homemade Hummus

Tomato slices, lettuce, spinach, or other favorites

1.Preheat oven to 450º
2.Snap the stems off the mushrooms.
3.Place the mushrooms face-up on a baking sheet.
4.Splash a few drops of tamari and Worcestershire (beer splash is optional) into each cap.
5.Place the stems into the caps.
6.Cook in a casserole dish for 10–15 minutes, until the mushrooms are soft and filled with liquid. Enjoy the stems as starters!
7.Cook the onion rounds on high heat in a sprayed skillet for 5 minutes, stirring often, until wilted and brown.
8.Spread the buns with Dijon mustard or hummus.
9.Place each mushroom on a toasted bun with cooked onion, tomato, lettuce or spinach, and your favorite fixings.
10.Serve with healthy fries.

Sweet Potato Fries

2 sweet potatoes with skins on, scrubbed and sliced into strips (I peeled mine - next time I'll leave the skins on and maybe they'll crunch up a bit.)


1.Preheat oven to 450º
2.Place the potato slices on a sprayed baking sheet and cover with aluminum foil.
3.Cook for 30–40 minutes, turning once.
4.Remove the foil after 20 minutes to allow the slices to brown.


Saturday, January 9, 2010

6 Week Challenge

Many of us over at the yahoo discussion group decided to join forces and partner in the 6 week challenge.

For some it's their first time, while for others it's a decision to begin again, to begin fresh with the arrival of the new year.

There's been a lot of energy with so many beginning the first of the year.  There's been lots of questions, answers, struggles, victories, and, of course, loss of weight.  But maybe even more important, there are some friendships being made and a spirit of support and encouragement has rained upon the this special group of E2Lers.

I've been eating for health/eating to live for over 3 years now.  I've lost most of my extra weight, but would like to shed the rest and arrive at my goal weight of 123 pounds.

My Dh has been reading, The Engine 2 Diet and has chosen to get rid of all the meat, dairy, oil and unhealthy processed grains and starches.  We pilfered through the kitchen cabinets/pantry finding all the SAD (standard american diet) foods and gathered them all.  My shelves are almost empty.  :)  I'm thrilled!  Now my refrigerator and freezer are buldging at the seams.  hee hee

Monday, January 4 began with a whole wheat bean burrito with homemade salsa for my Dh, and for me - I started out with my usual green blended smoothie. 

Smoothie Recipe

3 large kale leaves, stems removed
1-2 cups frozen spinach
1 cup stawberries
1 cup blueberries
1 TB ground flax seeds
1/2 dropper full of dha
1 TB chia, hemp or sesame seeds
1/2 frozen banana
1 cup unsweetened soy milk
enough water for 64 ounces of smoothie

This is my usual recipe that I pretty much stick to.  Sometimes I'll add some broccoli sprouts.  And occasionally I'll change the strawberries to a tropical fruit mix and the blueberries to a mixed berry.

I have lots of parsley growing and thought I might throw some of that in the blender too.  I want to up my crucifers, so I might add some of the broccoli stalk too. 

If any of you want to do that too, just make sure you peel the stalk first.

So I drink half of this in the morning.  The rest I'll drink later in the day or for breakfast the following morning. 

For lunch I prepared Dr. Fuhrman's vegetarian chili recipe in the Eat To Live book page 222.  The only thing I did different was to use yellow onion instead of red, I didn't add raisins or dates either, but added 2 cups of frozen corn.  We ate on this for most of the week, and afterwards we ate either an apple or an orange.  Dh is eating more grains/starches than I am, so with his soup he ate either a whole-wheat pita, or a whole-wheat tortilla.

Thursday I made Dr. Fuhrman's Asian Vegetable Stir Fry.  You can find this recipe in his Eat For Health book page 205.  I've eaten this a couple times already, but it's my Dh's first time and we both loved it.  It was so delicious and very filling.  We almost couldn't finish the suggested serving. 


I pretty much followed the recipe.  I didn't have bok choy so I used cauliflower instead.  One thing I will change the next time will be to add the sesame seeds to the stir fry instead of adding them to the baked tofu cubes.  There was too much waste.  I don't know if you can see it in the picture, but much of the seeds were on the foil and not the tofu.  Either that or I'll use 2 tablespoons instead of 4 and see if that makes a difference.

We finished the stir fry today at lunch.  Tomorrow I'm making a portobello burger with sweet potato fries.  Dh saw this in the Engine 2 Diet book and asked me to make this recipe next.  I'll post pictures if I remember to take them and let you know how well Dh is doing with eating for health. 

He's always been a meat and potatoes kind of guy and for him to want to eat healthy is such a shock to me, but I am so excited and feel so blessed to be able to share a healthy eating journey with my best friend. 

Eat to live!  John 6:58


Wednesday, November 25, 2009

Pumpkin Pie Smoothie


I made a pumpkin smoothie today.  I'm eating it now.  So yummy.

I say eating because it turned more into a pudding rather than a drinkable smoothie.  I still have 2/3rd's of it left so I may add more soymilk to make it drinkable. Or, I may just eat the rest as a pudding, it's so delicious.  :)

The seasonings were the same as on the canned pumpkin.  I used half of the pumpkin puree so I used half of their recommended spices.  The result is that it has the flavorings of a pumpkin pie.


Ingredients:

1 cup canned pumpkin
1 box 12.3 oz. silken tofu
1 cup unsweetened soymilk
1 frozen banana
4 date rolls or medjool dates
1 teaspoon vanilla extract
1/4 teaspoon ground cinnamon
1/8 teaspoon ground ginger
1/8 teaspoon ground cloves
1 pinch of ground nutmeg
1 - 1 1/2 cups of ice
~~~~~~~~~~~~~~~~~~~~~~~~~~~~~~~

Picture to the left is a coconut date roll.

Directions:
Add everything to vitamix blender and blend well.  Add the ice and blend well again.

Edit:  I left out the tofu, and it's just as creamy without it.  I want it to be more of a milkshake smoothie instead of a thick milkshake, but I'm happy with it the way it is. 
I'm afraid if I make it thinner, it will end up weak tasting and I don't want that!  It's delicious as is.

Also, this time I used medjool dates instead of the date rolls, and it tastes just as good.  If the coconut sounds good to you,  you could add some unsweetened dry coconut to the smoothie.  This recipe is enough for two servings, if you can control yourself and only eat one.  :-)

Tuesday, November 24, 2009

Carrot Cabbage Soup


I've come down with a cold, so I wanted to make a soup to help with the sore throat and raw sinuses.  I was going to just throw something together and have done with it, but I knew if I did that it probably wouldn't be as tasty as if I planned a recipe.

I had some cabbage on hand and wanted to do something different with it than what I normally do like a stir fry. 

This was a real challenge for me because I really don't feel all that well.  My head is throbbing a bit, so I grabbed my thinking cap and gently placed it on top of my head.  A brothy rather than creamy  soup sounded better to me for this cold, plus I didn't want to add another step to making the soup.

And, presto . . . . .  yummy.  Another favorite for me.  If you try it, please let me know if you liked it.  And please be honest.  I can take it.  :)

Ingredients:
1/2 cup pearl barley cleaned and rinsed
3 cups water
3 cups carrot juice
1 medium to large onion chopped
2 cloves garlic minced
1/2 large head of cabbage sliced
2 large carrots chopped
2 large ribs celery chopped (I like to add some of the leaves for soup)
1 tablespoon minced ginger
1 teaspoon fennel seed
1 teaspoon cumin
1 teaspoon dried basil
1 teaspoon dried thyme
1 teaspoon dried majoram
2 tablespoons dried parsley
1 can beans rinsed and drained.  (I used northern, but red has more nutritional value, which I'll try next time, but really, any bean is good.)
1 tablespoon apple cider vinegar

Pour the three cups water into a pot and bring to boil.  Add the pearl barley and simmer while you prepare the vegetables.

After the vegetables are chopped, add to a soup pot the onion and garlic and water saute  for about five minutes.  Add the rest of the vegetables and continue to water saute for about five minutes more.

Then add the minced ginger and all of the seasonings and stir well while adding the carrot juice.  Let the mixture come to a boil and turn off the heat.

When the pearl barley is ready, add it with the water to the carrot juice and vegetables mixture.  Add the drained and rinsed canned beans at this time too.  I didn't worry about using a 'no salt' can of beans.  If you look at the sodium per serving it will be less than the 300 mg allotment for the day on the Eat To Live program.  And the sodium gives it added flavor to the soup also.

Finally add the tablespoon of apple cider vinegar at the end and stir well.  Taste the soup to make sure the vegetables are cooked to your liking.  Cook a little longer if you like them soft.

If you can let the soup set covered on top of the stove for a while without the burner on before serving, it will allow the flavors to meld nicely.  Warm the soup before serving.  

I also thought I better mention that this is a sweet soup because of the carrot juice.  If you don't like sweet, either substitute some vegetable broth or water for some of the carrot juice or for all of it.

Sunday, November 15, 2009

Cream of Potato Soup

I'll post the picture tomorrow if I took one.  Can't remember if I did or not. :)

I made a cream of potato soup, adapted from a recipe that only had carrots, onions and potatoes.  I changed it so much that it really isn't the same recipe it once was.

I took into consideration my husband and myself.  I wanted to make a soup he could eat, but one that I could eat also.  This is a Vegan recipe.  I add the ham at the end for DH and remove my portion before doing so.

I don't normally eat the starchy vegetables, so it didn't bother me that this one meal would be more than the limited one cup portion of starch E2L allows.

So here's what I came up with.

6 good sized potatoes peeled
1 medium onion chopped
2 carrots - small chop
4 celery ribs - small chop
4 cloves garlic minced
1/4 cup cashews
1 cup soymilk
1 teaspoon Braggs Liquid Aminos
1 10 oz bag frozen cauliflower thawed
black pepper to taste
2 large kale leaves, center stem removed and chiffonaded
ham chopped in bite sized pieces - optional; don't u

Peel the potatoes and cube.  Add them to a good sized pan like a dutch oven.   Add enough water to just cover the potatoes.  Bring to a boil and lower heat to low and simmer until done, about twenty minutes.

Water saute the onions, carrots, celery, and garlic for about five minutes.  I like my veggies to still have some crunch.  Set aside until potatoes are cooked.

If you're going to use the ham, saute with a little canola oil while you're waiting on the potatoes.  Maybe 2 teaspoons.  I try to brown them on all sides for about eight minutes.  Take them off heat and set aside.

When the potatoes are done, remove from heat.  Measure 1 cup of the potatoes, it doesn't matter if a little water ends up in the cup and set aside.  Add the sauteed vegetables to the potatoes.

Place the measured, one cup of potatoes into the blender.  Add the thawed cauliflower, the cup of soymilk, the 1/4 cup of cashews, pepper to taste and enough water from the potatoes to be able to blend well.  Pour this mixture into the potatoes and combine thoroughly.

At this point I took out a serving for myself.  The rest would be for my husband.  I added the ham to the soup.  I didn't add extra salt because the ham has plenty of sodium and was enough flavoring for the soup.

For my portion, I steamed the kale for about five minutes and added it to my soup.  If I were to make this just for myself, I wouldn't add the ham, and I would increase the kale and add a whole bunch of steamed kale to the soup. 

Also, because I made the soup this way, I was able to add some nutritional value to my husbands meal by adding the blended cauliflower, soymilk and cashews.  He didn't know they were in there and I didn't offer the information either.

I'd love to hear from you if you decide to try this soup.  I thought it was really delicious, and for me, the added steamed kale was a nice addition.

Tuesday, November 10, 2009

Router replacement

There is a reason I haven't posted lately.  My router quit working so no internet.  I had to purchase a new one which cost me over $100. Yikes they're expensive.

I tried my hand at plugging it in and getting the software going so I could use the wireless feature.  I did fine with the desk computer, but when I tried to add my laptop, it took me a few hours to figure it out.

I don't give up easily though, so I kept at it until my laptop was able to get online wirelessly.  Yay, I'm able to surf the web, post on my blog and answer emails. 

Funny thing, it wasn't really difficult.  I felt kind of stupid when I found out how to do it.  :-)

Now I'll be able to keep up with my blog again.  What did we do without computers, the web, email, blogs, facebook, twitter, etc.?

Hopefully tomorrow I'll share another recipe.

Eating to live,
Laina :-)

Wednesday, October 28, 2009

Red Lentil Chipotle Mango Soup


1 cup red lentils
4 cups water
1 onion chopped
5 garlic cloves minced
2 large ribs celery chopped
2 large carrots chopped
1 teas cumin
1 teaspoon coriander
2 Tablespoons fresh ginger minced
1 1/2 cups frozen spinach
3 Tablespoons roasted chipotle mango sauce
2 squirts Chipotle Tabasco Sauce

In a large pan add picked-clean rinsed and drained red lentils and four cups of water. Bring to a boil and cover with lid tilted a little. Simmer over low heat until soft, about ten minutes.

Cut and chop the onion, garlic, celery and carrots. With the celery I cut three long slices lengthwise and then cut into bite size pieces. I cut the carrots lengthwise also and if they are on the larger size I cut again so you have four separate lengths. And then chop them as you normally would into bite size pieces.

I water saute the veggies for about five minutes. I like crunch in my soups so I cook my vegetables crisp-tender . I taste as I'm sauteing so I make sure it's the right texture for me. You may like yours cooked completely and if so keep cooking for another five minutes or until it cooks to the degree of doneness that you like.

TIP: If you leave the vegetables crisp tender, I think you'll find the flavor of the onion, garlic, carrot and celery is more intense.

When the lentils are finished cooking, you can blend them in your blender or use an immersion blender. I leave mine as is without blending.

Add your sauteed veggies to the lentils and add the cumin, coriander, ginger and the spinach. You can use fresh if you'd rather. I always have frozen on hand and it's quick and easy. Stir to combine all the ingredients.

At the end I added the roasted chipotle mango sauce. You can order the mango sauce online http://www.lwcbrandsinc.com/fth15ozboofr.html or just add a small amount of pureed mango. (If you decide to purchase the sauce online, the raspberry is really tasty too.) The mango gives the soup a really nice, mild sweetness. If you're one that doesn't like any sweetness at all to your savory dishes don't add it because you probably won't like it.

And finally add a couple of squirts of the chipotle tabasco sauce or to taste. And if you substitute pureed mango for the mango sauce, add an extra squirt or two tasting as you add.

I hope you'll try this soup and let me know how you like it. Cook and eat to live everyone!

Laina :-)

Tuesday, October 27, 2009

Last of my eggplant

I'm so sad. I just picked what may be the last of my eggplant for the year. We have a cold front coming in and it's suppose to get down to freezing for two nights in a row. There are some flowers still on the plant but they'll fall off when the temperature drops.

My bell peppers have already stopped producing. Well they've been blooming and there is a bell pepper, but it's the size of my pinky nail so I pulled them up, root and all.

I didn't get a whole lot of the aubergine, but I'm grateful they did okay and that I was able to enjoy one of my favorite vegetables. I have heard from others that some of their garden didn't do so well this year, and was sad for them because I know how much that hurts when you spend lots of money, time, and effort with the results being no crop, or a ruined crop.

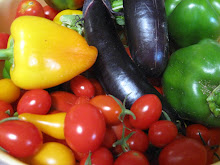
I also picked probably the last of the zucchini too. You'll see them in the photo along with the tomatoes. I'm going to try to save the tomato and zucchini plants by covering them with blankets at night and then uncover them during the day.

Susan at fatfree vegan calls this Fuhrman weather. I chuckled because Eat To Live is all about greens and this is the best time of year for them - spinach, lettuce, kale, collards, cauliflower, broccoli, cabbage . . . etc. Also many of these are cruciferous veggies which are stars of this diet, especially for those who have autoimmune diseases.

Tip:

I picked whatever grape tomatoes were left in the garden. Many are orange, not nice and red, but here's a tip. Many think you should put a slightly green tomatoes, or not quite ripe tomatoes on the window sill to complete the ripening process.

I use to think this too, but I came across a tip (don't remember where) and tried it to see if it would work. And it did. The author of this tip also said that all I was doing was frying my tomatoes when they sit in the sun like that.

So next time you've got an unripe tomato, wrap it in a towel on your counter. It will ripen within a day or two if it's close to already ripe. I'm going to try it with the grape tomatoes in the picture above and see if I can get them to redden up a little more.

Also, it's not a good idea to refrigerate tomatoes. It makes them mealy and removes flavor somehow. So purchase your tomatoes when you'll use them or use within 3 days of purchase. Also when your tomatoes are sitting on the counter, turn them over stem side down. It helps them to last longer.

Eat to live everyone!

Laina :-)

Monday, October 26, 2009


I am still so thrilled with my homemade soy yogurt. I ate some with lunch today as a dessert.

I measured 1/2 cups of frozen blueberries and microwaved them just enough so that they weren't frozen hard anymore, but still frozen. Sort of like a softer frozen only not soft. Is that confusing? :-)

On top of that I added probably three forth's cup of my homemade yogurt, and I absolutely loved, loved, loved it. Most of the blueberries are underneath the yogurt.

Smooth, creaminess passed my lips with a mild tartness with a slight hint of vanilla. I thought my yogurt days were over, but since trying the crock pot method of making yogurt, I'm now doing a happy dance with my bowl of yogurt in one hand, and a spoonful of yogurt in my mouth with the other.

I'm thinking that I could do this with any fruit and combine it to make a nice, creamy yogurty dressing for my salad, or just enjoy it as a dessert.

Either way, if you're someone who is vegan and have given up yogurt because it's dairy, this yogurt version made with soy milk is quite delightful.


A guy named Slim from a yahoo group discussion list came up with a different version of yogurt that I'd like to try sometime soon. He uses lentil milk with some other ingredients which sounds intriguing. I'll let you know when I give it a try.

Eat to live!
Laina :-)

Friday, October 23, 2009

Soy Yogurt

I' m so excited that my yogurt came out so well the first time I tried it. Don't you just love it when that happens. :-)

I read a few different websites about making your own yogurt, and the crockpot method drew me right in because I like simple and easy.

I did have a nice picture of the mixture in my crockpot, but can't seem to find it so I may have deleted it. But the picture above to the left gives you an idea of the final product and it's thickness.

But one of the website I surfed over to that encouraged the use of the slow cooker had in the comments section under the recipe that the rice milk and the soy milk didn't turn into yogurt. So because of that, I was apprehensive about trying to make soy yogurt in my crock pot because I didn't want to waste my time and money on something that wasn't going to work.

Another website suggested adding tapioca flour and agar. I bought the flour and thought I had agar at home but didn't, so I felt for sure my recipe wouldn't come out right. But I decided to try anyway because I didn't want to wait another day. :-)

Before you begin, make sure you sterilize whatever utensils you'll be using. So here's what I did.

I added two containers (32 oz) of Westsoy Organic Unsweetened Soymilk into my crockpot, and turned it on low for two and one half hours.

I was going to add the tapioca flour, but forgot to. An hour had passed before I remembered, so what I did was measure out a cup of the flour and added just enough water to mix. I took that mixture and added it to the crock pot and whisked well to incorporate it throughout the milk.

When the two and a half hours were up, I turned off the crock pot or you may want to unplug the unit to know you've turned it off, and waited for 3 hours.

After the 3 hours were up, (set a timer so you don't forget) I took out about one cup of the mixture from the crockpot and added six ounces of Silk Live Soy Yogurt. The health food store didn't have plain so unfortunately I had to use the vanilla.

This particular brand of yogurt has 6 live cultures, but............. it has added ingredients that I don't care for. There's one other store here locally I can check to see if they have a better brand of soy yogurt. I live in a small town so I'm limited to the amount of choices I have.  

I put the lid back onto the crockpot and wrapped the whole thing in a very large heavy towel and let it set overnight. In the morning, about twelve hours later I checked on it and was thrilled at the results.

It was creamy smooth with a very nice texture. The yogurt had a nice tang, not overpowering. The only thing I didn't like was the faint vanilla flavor. I had hoped that the six ounce vanilla flavored yogurt wouldn't be noticed in the large batch of yogurt, but you can taste it, but it's faint. So I hope I can find some plain soy yogurt before I try this again.

The rest of the flavor tastes very much like the soy milk. I haven't added any fruit yet, but I'll be eating some yogurt by itself and probably add some thawed frozen fruit.

I have a nice Dole frozen fruit variety in the freezer. I also have a bag of frozen blueberries I may try. Or another possibility would be to use some just-fruit jams I have in the refrigerator that might taste nice with the yogurt.

I added one cup to my morning smoothie and it added a nice flavor. There was sweetness from the fruit and a little tart from the yogurt. It was a nice combination.

After setting in the refrigerator for a while the yogurt mixture thickened some. Here's a picture of it a couple of hours later.

So if you've been wanting to try your hand at making soy yogurt, I think you may want to give this a try.  It really is so very easy and simple.

If you don't want to make that much at one time you can cut the recipe in half. I've read on others websites that this will last 7 to 10 days. So for me, this recipe is a bit too much since I'm the only one who will be eating it.

I'd like to try almond milk next time and see how it turns out. 

All the best to you and your health.

Laina :-)

Wednesday, October 21, 2009

Laina's Vegan Chile

Tonight I decided to make my own version of a vegan chili. It came out really good except it was just a tad too spicy. The next time I make this I'll use less chili powder.

My DH doesn't follow the E2L healthy diet so I made the recipe and set some aside for him and added his ground beef to his portion.

Laina's Vegan Chile

2 small onions chopped
4 cloves garlic minced
2 bell peppers (any color) chopped
2-3 medium carrots chopped
1 large rib of celery chopped
1 pound mushroom sliced
2 cans no sodium beans (kidney, pinto, black, northern - whatever you like)
1 32 ounce can of tomato puree
1 15 ounce can of diced tomatoes
2 cups frozen corn
1 Tablespoon masa
2 teaspoons ground oregano
2 teaspoons ground cumin
1 Tablespoon crushed leaf basil
1 Tablespoon crushed leaf parsley
2 teaspoons red chili powder
1 teaspoon red wine vinegar
currants or raisins added when serving if desired

Water saute onions, and garlic for a couple of minutes. Add the peppers, celery and carrots and water saute for 3 more minutes on medium heat. Add a little water as needed for sauteing. Add mushrooms and saute for 2 more minutes.

Add the rest of the ingredients and mix thoroughly. Heat for five minutes on low and add more water if needed according to the consistency you like. To the right is a picture of the chili I use or a brand that is similar. I don't have a picture of the exact same brand, but this is the same, just a different company.

The kind you purchase in the spice isle in a jar has salt and other spices added to it. This red chili to the right is pure red chili. If you can't find it where you live and would like me to purchase and mail you some, just let me know.

Or, if you can't find this in your store you can always buy the red chili pods or even the crushed red pepper and grind away in your coffee grinder.

When I serve my chili, I lay a bed of lettuce in a bowl. I used romaine, but you can use any lettuce or spinach. If I had green cabbage in the fridge, I would have used it.

Add the chili to whatever green you chose and top it with grape or cut up tomatoes and add about one tablespoon of currants or not.

Here's a picture of what I ate tonight. Yummy!